
Just like most hifi enthusiasts, we are always looking for that unattainable, perfect sound. Once we think we have made that purchase that will finally result in “the ultimate system”… suddenly we find a hum, or a slightly muffled base, or an imaging problem. The list, unfortunately, is never ending. So what do you do? Make another upgrade? Try to prescribe the perfect remedy to aide whatever is ailing your system? But before you make that next purchase, have you really done everything to maximize what you already have? There are countless tweaks that you can do to your system that will take the equipment you own to the next level.
Here we will concentrate on just your speakers. Try these simple, affordable and basic tricks that will elevate the performance of your speakers, and in fact your entire system, so that you get your upgrade without actually purchasing new ones.
1) Speaker Placement
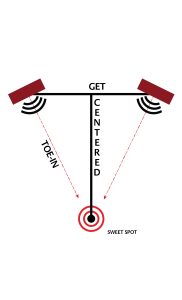
The importance of the placement, toe-in and leveling of your loudspeakers cannot be stressed enough. You can’t just plop your speakers in any arbitrary place in your listening room and expect great results. Finding the correct speaker placement is a precise and sometimes tedious task, but it has a HUGE pay-off. For a guide through this process please see our previous blog: Speaker Placement in 5 Easy Steps or our Speaker Placement download. Another helpful tool for perfect placement is a set-up CD. The Nordost System Set-Up & Tuning Disc contains tracks that will help with everything from speaker placement and sub-woofer integration, to performance checks and assessment, problem location and system conditioning.
2) Keep Them Tight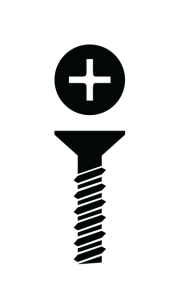
Over hours, months, years of intense listening sessions, constant vibrations in the speaker cabinet, and even a climate that induces wood to dry out, will cause a screw or two to become loose. Make sure to check all of the connections, especially those that attach the driver units to the front baffle, and tighten any screws that need it. Just be careful not to overtighten as this could lead to a stripped thread.
3) Maintain Clean Connections
 Sometimes all you need is a little maintenance to ensure optimal performance. Take a few minutes once a month to clean the contacts on your loudspeaker terminals as well as the connectors on your speaker cables with a high quality contact cleaner. This simple step will not only improve the conductivity of the connection and reduce RMI and intermittent connections, but it also protects your contacts against oxidation and corrosion. We recommend the DeoxIT® Gold GxL Series
4) Anti-Static Treatment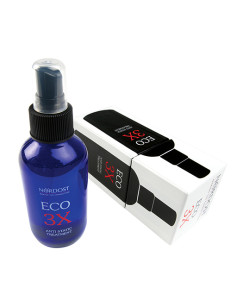
Anti-static treatment is a must. Used on both audio and AV gear, this spray helps to fight the deceptively dangerous, slow build-up of static charges. Static charge can do everything from flatten perspectives to inhibit the dynamics of a sound system. Simply spray a small amount of Eco 3X onto a cloth and wipe the area around speaker drivers. You will begin to reveal a more relaxed and natural soundstage. We especially recommend using Eco 3X in the winter months when static build up is more prevalent.
5) Grill on or off?
 There seems to be an ongoing debate about whether or not to keep grills on speakers. Some of you may have already decided to take the grill off your loudspeakers or may have ordered a grill to put on your speakers for purely aesthetic reasons. The fact of the matter is anytime you put a piece of material in front of a sound wave there will be an effect on the music produced—Grills do make a difference. The real question is if this difference is positive or negative. What was intended for your specific speakers? Were the loudspeakers voiced with the grill on, or was the grill added as an afterthought accessory? Call your speaker manufacturer or dealer to find out what is optimal for the loudspeakers you own and make the change accordingly .
6) Reduce Surface Contact of Speaker Cables
As a cable company, we have some tricks of our own for this problem. The capacity of a speaker cable is negatively impacted by the electric static stored in floors. This is one of the reasons Why You Should Be Using Flat Speaker Cables. The ability of flat cables to stand up vertically minimizes the contact area between the surface and the cable itself. Alternatively, invest in cable raisers, which accomplish a similar effect to what Nordost speaker cables take care of by design alone.
7) Resonance Control
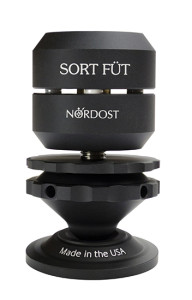 Vibrations are a byproduct of any component that uses energy to power itself. Unfortunately these vibrations have adverse effects on audio systems, including confusion of imagery, timing errors and musical distortions. Loudspeakers are the biggest culprits of generating this harmful distortion. By introducing resonance control devices like the Sort Füt to your speakers, you are providing a direct ground path, allowing extraneous energy to escape from the cabinet. Once you have eliminated these harmful vibrations you will be able to hear a reduction in intermodulation distortion, an expanded soundstage and an increase in tonal and textural details from your loudspeakers. The great thing about the Sort Füt is that since there are a large variety of threaded rods available, this is an upgrade that can be transferred onto almost any speaker model if you finally do one day decide to purchase a new set.
Learn more in our “Tiny Tweaks, Big Pay-Offs – Simple adjustments that make a difference” download!
How are the sort fut applied to a bookshelf with speaker stands?
When using bookshelf speakers, you would attach our Sort Füt to the speaker stands that the speakers sit on, as long as the stands have threaded inserts on the bottom where removable spikes would normally go.