
By: Steve Greene
Maintenance. If you are a hands-on audiophile like many of us, you occasionally face the task of updating/repairing your system’s components and ancillary devices. I personally love vintage tube audio gear, which has its own set of maintenance chores: checking the tubes periodically with a tube tester, cleaning the tube pins, replacing power supply capacitors, or the notoriously problematic (after 50 years of use) bumblebee capacitors such units may contain.
For many lovers of vintage tube audio gear, the holy grail of preamplifiers is, perhaps, the Marantz 7 and/or the McIntosh C-22. These two items from the late 1950’s through late 1960’s have become quite scarce and, as a result, have risen dramatically in price on the popular auction sites. I was incredibly lucky back in 1993 to acquire a Marantz 7 via a trade of audio gear with a gentleman near the Blue Ridge Mountains. He had inherited this pristine piece of gear from his uncle many years prior. However, he became tired of periodic tube replacement and occasional trips to the repair shop for slight issues beyond his own capabilities. I was thrilled to acquire this piece of hifi history and, having already built a few kits (Heathkit, Dynakit), felt ready to take on a revered component for the long haul.
The immediate needs for this preamplifier immediately after my acquisition were new caps on the top mounted phenolic board. One “bumblebee” capacitor (named for their black body, surrounded by colored stripes) had a big crack running from one end to the other. While many aficionados consider it heresy to replace any of the active components in a vintage (and valuable) piece of collectible audio gear, I now had my excuse to update this preamplifier with some newer, better performing modern components. I replaced all of the capacitors on the top phenolic “turret” board with boutique-type TRT SETI Infinicaps, a couple Hovland MusiCaps, and fresh Nichicon Muse and Sprague Atom small electrolytics. I replaced the tubes, six 12AX7A’s, as well. With periodic tube replacement, this preamp has now served my “upstairs system” exceptionally well for nearly thirty years. However, as you may have guessed, now I’m going to relate my most recent maintenance on this revered piece of gear…
I have mentioned the top facing phenolic/turret board in the Marantz 7. It is not a circuit board, the components are hard wired to “turret-type” posts, not traces.
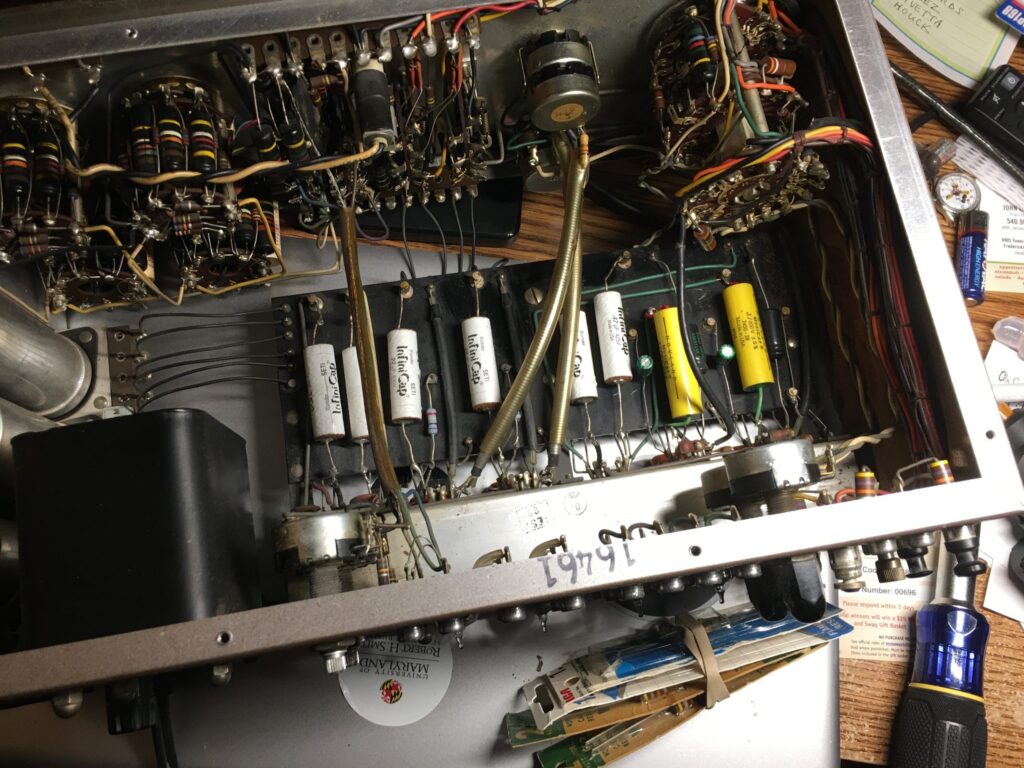
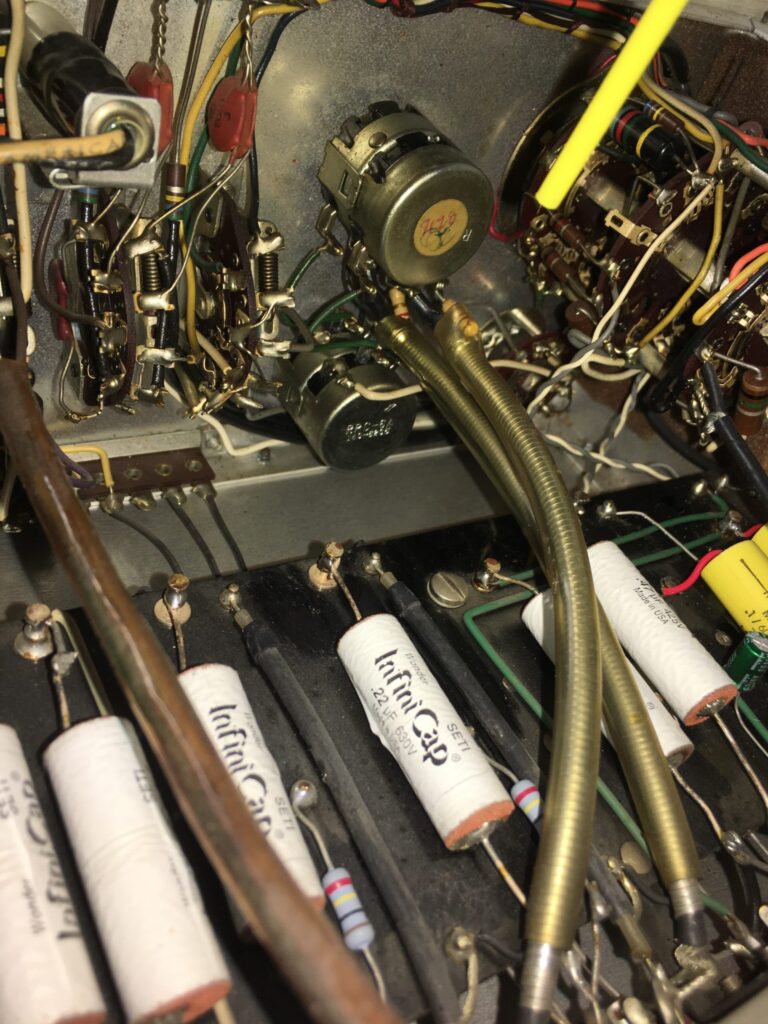
This board is also attached to a metal flange that contains the horizontally mounted 12AX7A tube sockets, which protrude from the back panel. To reduce the deleterious effects of vibration (creating undesirable microphonics), this board and metal flange “float” on three metal/rubber suspension screw-in “grommets”.
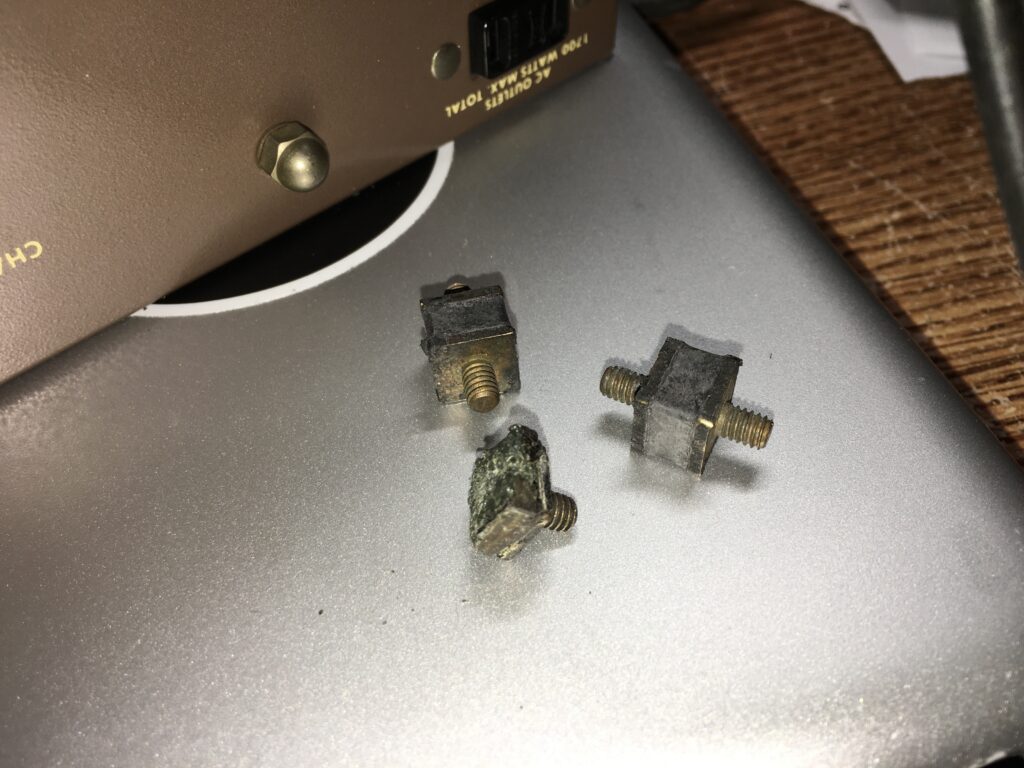
These are crucial to the design of the preamp, and mine had (as is common) deteriorated to the point of splitting in the middle of the rubber and separating. Instead of floating, the board was resting, undesirably, on the chassis.
Fortunately, an enterprising audiophile/businessman in Hong Kong had acquired a stock of NOS (new old stock) metal-rubber isolation/suspension mounts years ago and kept them in an oil bath, keeping them fresh. I was lucky enough to acquire a set about five years ago and had been waiting for the perfect moment to install them ever since!
This week, I got into the proper mood to finally undertake the task of installing them. The job was not nearly as difficult as I had feared. In fact, it took me longer to remove all the interconnects and tubes and disassemble the unit than it took to complete the task. Now completed, the turret board and tubes float on the suspension mounts as they are supposed to!
While I had the unit open, I took the time to also spray the insides of the balance and volume controls with Deoxit FaderF-5 to lubricate and clean the wipers in these controls, which should eliminate any scratchy issues with either pot. I also used the same solution to clean the contacts on the selector switch. Another nice tweak I like to do is clean all the tube pins with an emory board. This removes any oxidation or possible corrosion on the pins ensuring better contact. If you decide to replicate this tweak, however, make sure to do this gently—you don’t want to thin the pins, which could result in looser tube pin tension.
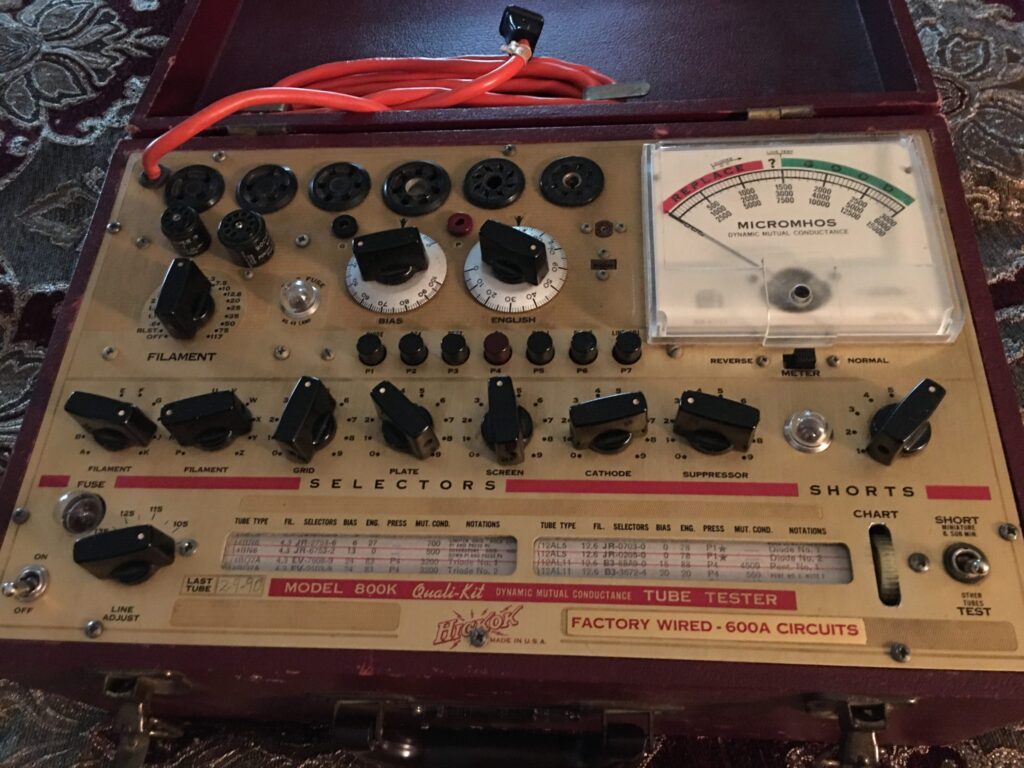
Lastly, I checked the tubes on my trustworthy Hickok 800A tube tester. Tube testers are essential if you want to eliminate that nagging, paranoid feeling when you suspect, but don’t definitively know if your tubes are nearing the end of their useful life. In my opinion, too many audiophiles replace tubes before they really need to. My GE 12AX7A’s in the Marantz 7 have served faithfully for over five years and they still tested strong! While quality tube testers have become pricey on the used market the past ten years or so, I am a firm believer that if you are going to utilize tube components in your system, you must own or have access to a quality tube tester.
When buying a tube tester, make sure it’s a mutual transconductance-type tube tester, not an emissions tester. Two of the more common and best performing mutual transconductance-type tube tester brands are Hickok and B&K. The Hickok 539C is the holy grail of Hickok tube testers but the 800A, 600A, 6000, 533A, 752 and others are all great testers. I also like the B&K 700 and 707 testers. If you don’t want to pay the high price found on the popular auction sites, go to a local AARL sanctioned Hamfest. Now that things are opening back up a bit…you might find a bargain! Realize, however, that testers should be calibrated and the (usually two) rectifier tubes inside them must be good or replaced.
As an aside, my Hickok was a Christmas gift from my father back around 1989. When my mother saw it, she was mortified, as she thought he had gifted me a piece of junk (my mother is the same person who was equally mortified back when I, as a teenager, installed a large FM antenna system with rotator on the roof of the family home while my parents were away for the weekend)! I, on the other hand, loved the Hickok! I later told my Dad that the Hickok was the best gift he ever bought me, and I still use this extremely useful tool on a regular basis.
So, how does the Marantz 7 sound in my system now that it has been refreshed? Wonderful! That’s why I have kept it so many years. Plus, it has a ton of flexibility with numerous inputs like two sets of phono jacks, four sets of auxiliaries (labeled aux, tv, fm multiplex, fm/am), a tape head, a tape monitor and a set of microphone inputs. This unit even has two sets of outputs so that I can connect two monoblocs and two subwoofers!

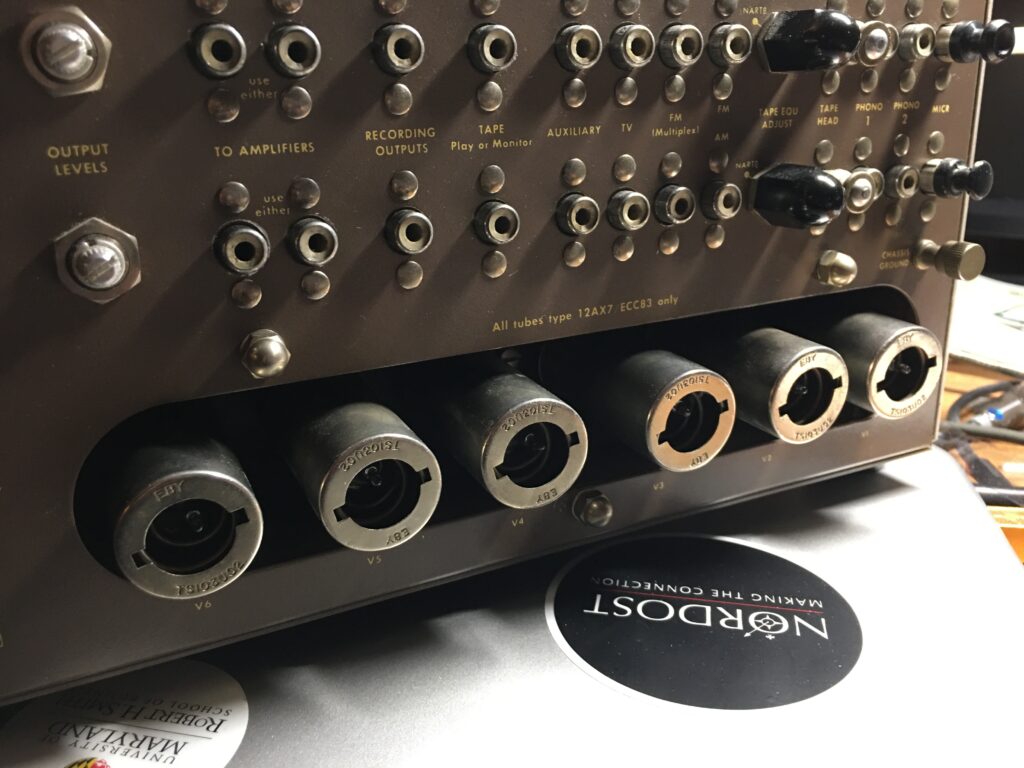
However, the story has not ended just yet. I have more work to do at some point in the future… My unit still has the original selenium rectifier that should be replaced with diodes and the original multi-section electrolytic cans for the power supply, which could prove to be a difficult job. I will also probably replace a few more resistors on the bottom side of the unit. There are lots of carbon composition resistors there that have the possibility of drifting in value and/or getting noisy after so many years. The tone controls (separate bass and treble for both channels) have a ton of difficult-to-access bumblebee capacitors on them too. They are a paper-in-oil composition which leads to failure from simply picking up moisture after many, many years. Polypropylene, Teflon or polystyrene capacitors make very good replacements for the failure prone bumblebees, but it would be a herculean task to replace them all! One other potential future chore? Replacing the old-style tin-plated RCA jacks on the back of the preamplifier with new and more robust gold-plated RCA jacks. There is so much on the to do list!
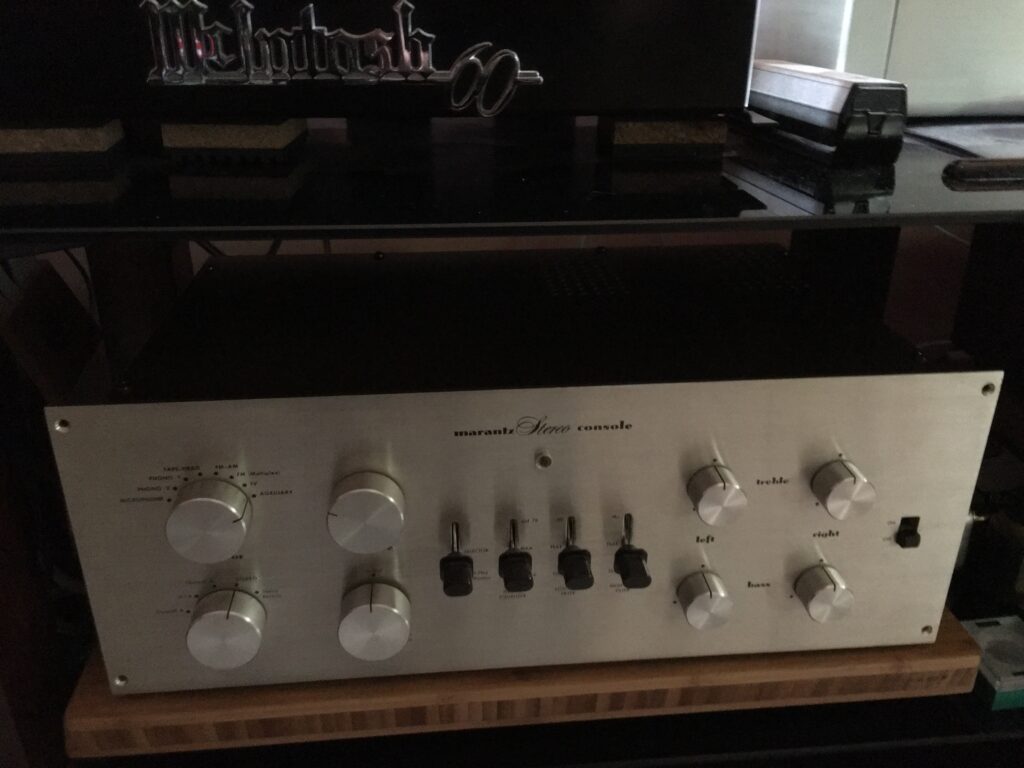
I would be remiss if I didn’t mention how well our Nordost Valhalla 2 interconnects grip the old-style RCA jacks on this preamplifier. The HOLO:PLUG RCA connectors do a wonderful job of securely gripping these shallow jacks, ensuring maximum signal transfer. Those interconnects also contribute greatly to the three-dimensional sound of my system. In my system, the Marantz 7 feeds a pair of refurbished McIntosh MC-60 tube amps, which I completely rebuilt nine summers ago. Since I am only using one set of the phono input jacks on the Marantz 7, I have a QKORE RCA wire attached to one jack of Phono 2, which then connects to a QKORE3 Grounding Unit. This reduces the noise floor of this preamplifier, resulting in even better sound quality. The preamplifier’s power cord is also plugged into a QB8 QBASE which itself is attached to a QKORE1. The system is dead silent and sounds sensational, if I do say so myself! Make sure you ask your local Nordost dealer for a demo of our superior grounding products. I would also highly recommend you ask them for an in-home evaluation of our interconnects, speaker cables, and power cords, since there is no better test than hearing these products in your own system! You’ll be glad you did!
Like I said, there is still much to be done to my Marantz 7, but that’s the type of commitment you take on when you choose vintage, “golden-age” audio components. Stay tuned, and I’ll let you know the results of my next steps. Is it a lot of work? Yes. But for the right person, the work is well-worth the reward!
Hi,
great work and I am starting the work on mine as we speak. I am ver jelous that you got hold of the original grommets! Can you disclose the source or do you have spares which you are willing to sell?
All the best
Markus
My source was an ebay seller in Hong Kong. He had stored some of these grommets in an oil bath to preserve them. I just found his website again so here’s a link, http://www.reallygoodstuffs.com/M7%20Suspension.htm. Looks like he still has some! However, there was also an ebay seller, madmaxmad, who sold newly manufactured chassis mount isolation grommets pretty much identical to the originals. I looked and unfortunately he currently has no items listed for sale. You might try to contact him to see if he still has a source for them. Personally, I’d recommend you contact “reallygoodstuffs” to order the originals as I had great luck with those!
good
could you explain further about the grounding of the phono 2 input and how that lowers the noise floor.
My turntable is connected to the phono 1 jacks on the Marantz. The phono 2 jacks were not being used so this was a great opportunity to connect my QKore 3 unit. The QKore 3 has three WBT binding posts which allow you to connect a QKore wire from the QKore 3 to one of the unused RCA jacks on my Marantz 7 via a QKore wire (RCA to Spade). The QKore 3 provides a path for the post transformer (DC) ground noise side (the preamps signal circuitry, not the power supply) out of the Marantz 7 into the QKore 3. IE-the secondary side of the power supply). This lowers the noise floor by providing a path for stray high frequency noise and voltage generated magnetic fields to a manufactured earth point. Lower noise results which increases the reproduction quality of the system.
Hi.Do you have the selenium rectifier for Marantz 7 preamp?
My Marantz 7 still has the two, original selenium rectifiers. If in the future I decide to replace them, I’ll probably go with fast recovery diodes (Hexfreds I believe they are called). Standard wisdom from a number of DIY folks is to leave the selenium rectifiers alone if they are operating properly (all voltages within normal parameters). If you are looking for those particular selenium rectifiers, however, I believe there are sellers on ebay who occasionally have them. Remember, however, those NOS parts are probably over 40 years old despite being unused.