
Speaker set-up is an exacting and time-consuming process consisting of endless small, repetitive motions. A centimeter back, a touch of a rotation, a tilt forward— every minute movement making a world of difference in the performance of your system. While some find system set-up to be a fun and interactive process, allowing you to intimately understand your hi-fi system, others find it to be pretty tedious.
Whichever side of the camp you fall on, if you come to this task well-prepared, it is sure to go a lot easier for you, and, hopefully, it will be quicker too! That is why we have come up with a comprehensive list of everything that you’ll need as you tackle speaker placement!

1) Masking or “Low-Tack” Painter’s Tape
You’ll be using your masking tape to “grid” the floor and to ensure that you are making uninformed adjustments to both the left and right speakers. You can even use your masking tape to mark the final placement of your speakers, to save you the trouble of redoing the whole process in case your speakers are accidentally moved. If you decide to mark the final placement, you may want to opt for a more discrete colored tape.

2) Marker Pen
You can use any type of writing utensil, as long as it allows you to clearly make marks on your painter’s tape.

3) Tape Measure
Your tape measure should be a least two meters long since it will be used throughout this process to take precise measurements of your speakers, as well as their relation to elements of the room. It may also be used to measure and mark increments on your painter’s tape.
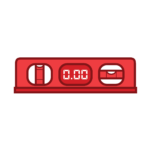
4) Spirit Level
It is best to use a digital level, but both long and short bubble levels can be useful too. Use your level to make sure that your loudspeakers are on an even plane and to find an even rake and azimuth angle for your speakers. It will also help to ensure that all of your components and equipment are level.
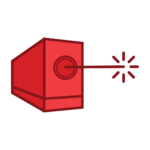
5) Laser Pointer
A laser pointer will make it easy to determine if your speakers are set to equal heights. It will also help to identify the sweet spot for your system and allow you to keep track of movements relative to the listening seat.
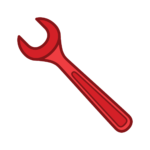
6) Speaker-Specific Tools
These tools should have been supplied with the speakers themselves to aid in set up. Some tools may include— a spanner for locking spikes, a pry-bar for adjusting spikes, or chocks.

7) Air Wedge (optional)
If working alone, an air wedge (typically used to position doors or windows) will help you lift speakers safely, one side at a time. You should also be aware that many speakers are heavy and moving them should be undertaken only with great care and sufficient manpower for the task. Struggling to move a large speaker on your own could result in serious injury! An extra pair of hands (and ears) will make adjustments much easier, more precise, and safer too.
Now that you have all the equipment handy, you’re ready to get started! To figure out which set-up method works best for you, and to learn other essential tips, download our Speaker Set-Up Guide!
 Download the Nordost Speaker Set-Up Guide