Questions and Answers (QKORE)

Our product specialists receive questions on a daily basis about Nordost products, their application, and hifi in general.  We thought that we would take a minute to share some of our most recent and frequently asked questions about the QKORE here, so that everyone can get the answers they are looking for!


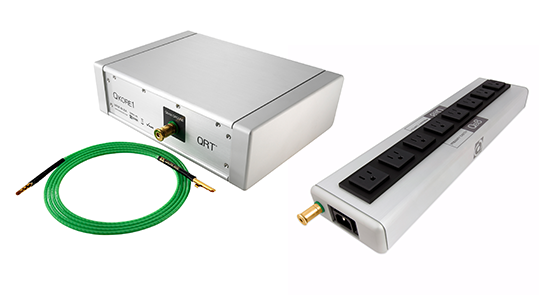
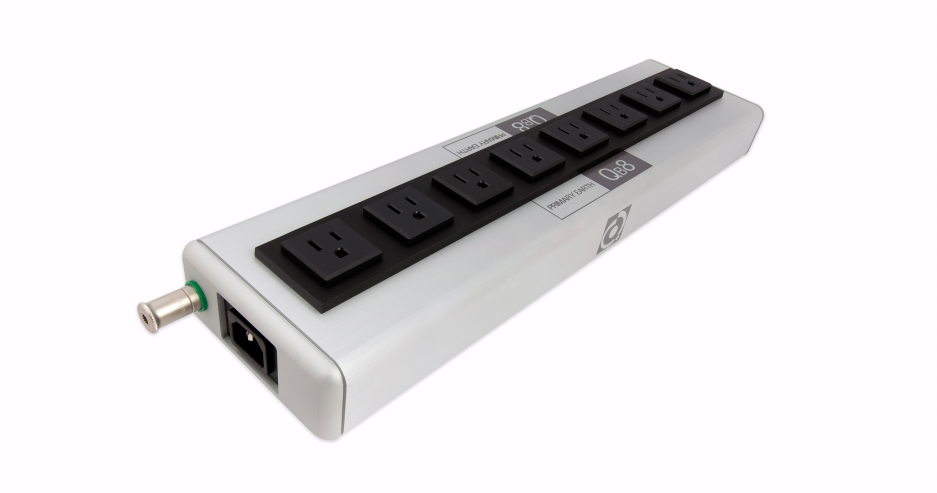
Q: The literature indicates that the QKORE1 is designed to be used with Nordost’s QBASE AC Distribution bar. But can the QKORE1 be used with other distribution bars in the market?

A: The QBASE is designed so that when the QKORE is attached through its binding post, the ground pin of the input is drained out BEFORE any contaminants on the AC line reach any components. If the distribution bar you would like to use with the QKORE has a similar design to that, it will work fine. However, we cannot speak for how other manufacturers design their distribution bars, so we cannot guarantee the same results.


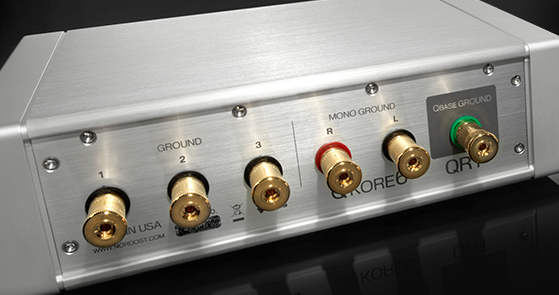
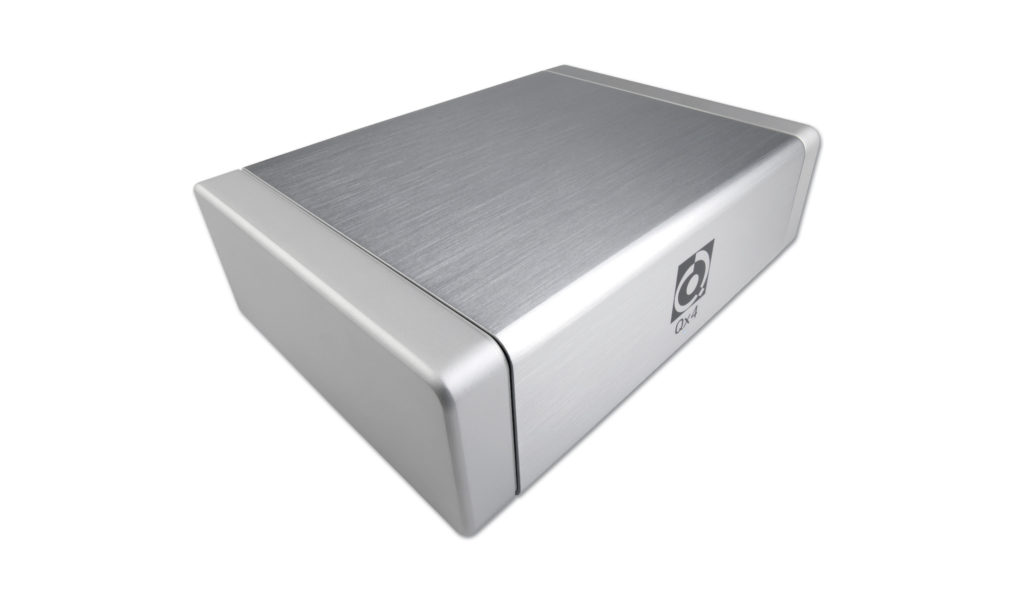
Q: What are you supposed to do with the “mono ground” binding posts on the QKORE6 if your system does not include any monoblocks?

A: The mono ground binding posts connect to the same LVAP as the other 3 Ground binding posts that address the secondary side of the power supply. Therefore, if you do not have monoblocks in your system, you can use these two binding posts to connect any other component in your system. The thing that differentiates the “mono ground” binding posts, and makes them ideal for use with monoblocks, is that they are connected to identical-length wires, which connect to the exact same point on the LVAP. We have also found that in addition to monoblocks, front end components with separate chassis, like a DAC and a clock, benefit from being hooked up to these two specific binding posts as well.


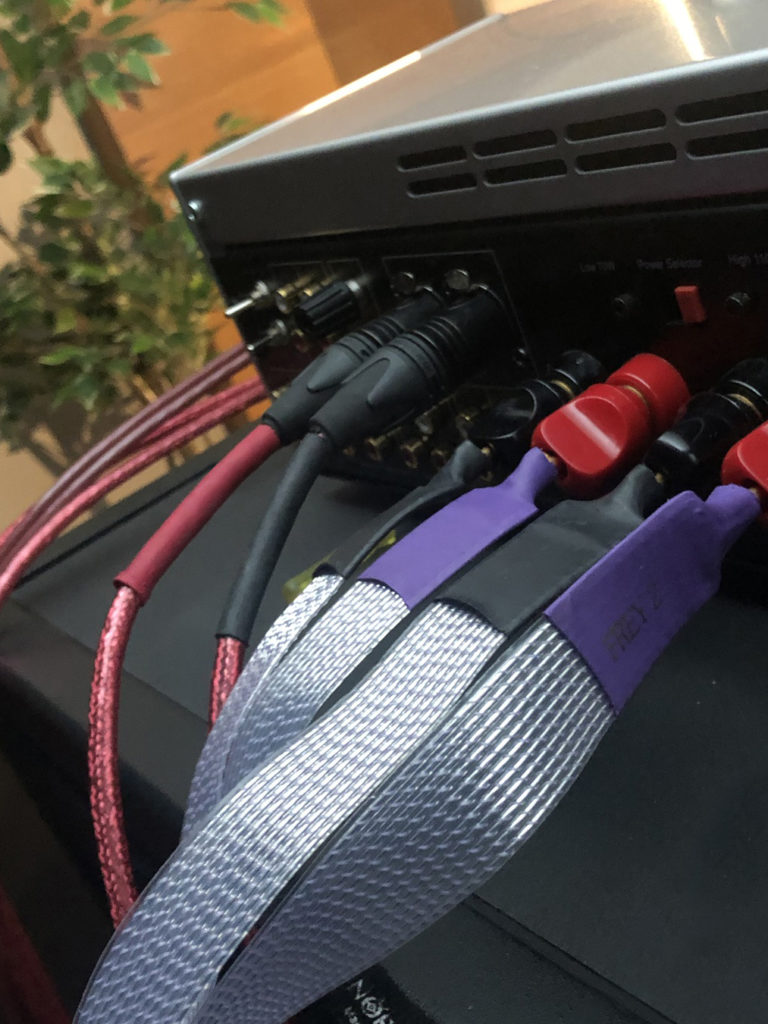
Q: Can you connect loudspeakers to a QKORE?

A: No, you should not connect your loudspeaker to a QKORE. This could result in a short circuit to your amplifier. However, if you are using an ACTIVE loudspeaker that requires a power cord, it usually means that there is an amplifier inside of your loudspeaker. If that’s the case, then you can connect the loudspeaker to your QKORE. But keep in mind, when you do this, both loudspeakers should be connected to a QKORE unit separately.


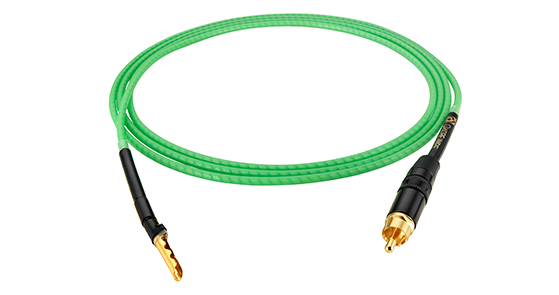
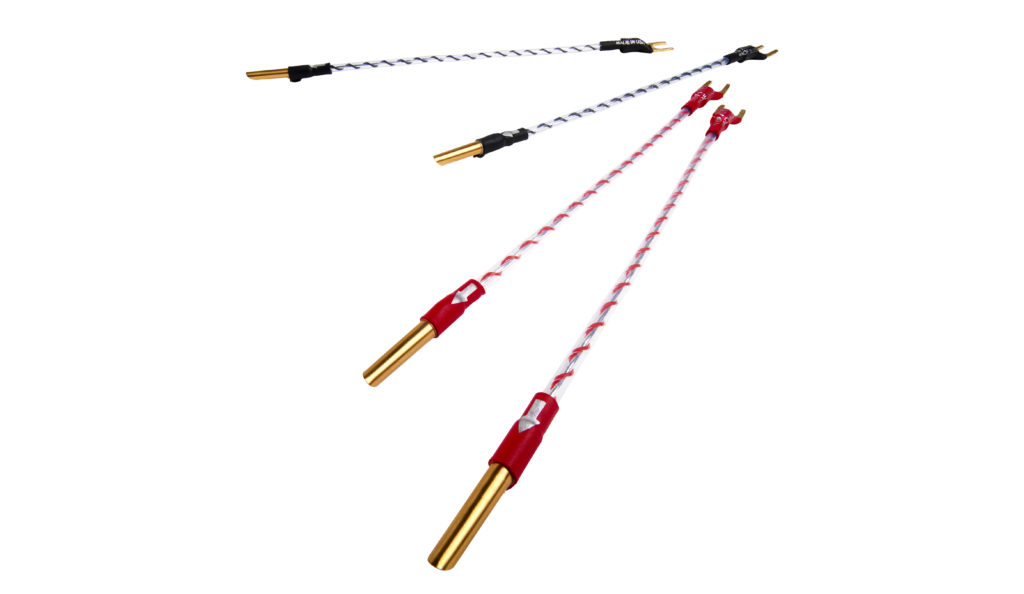
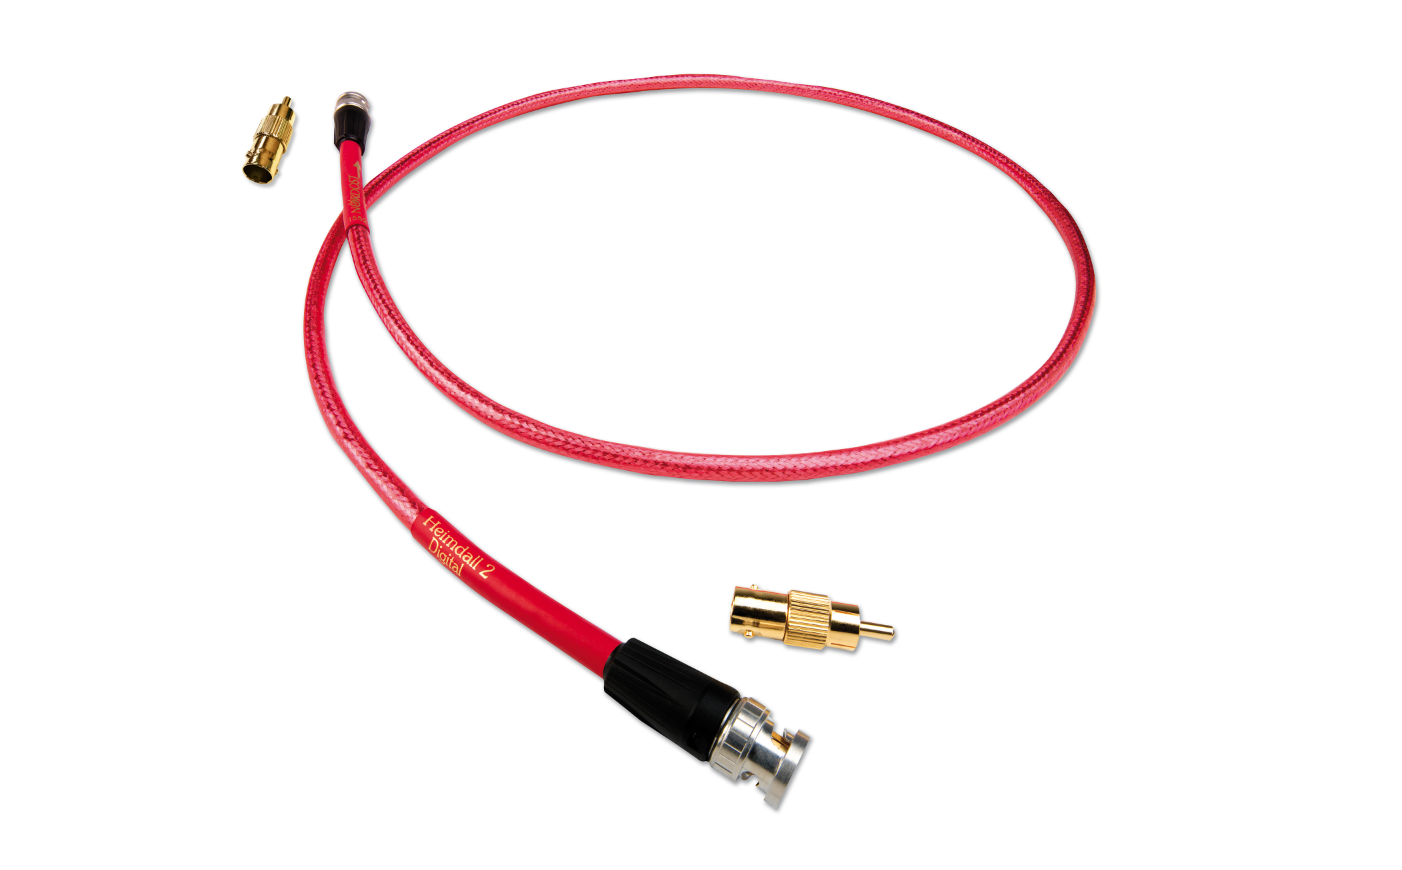
Q: Do you have to use Nordost’s QKORE Wires to connect your components to the QKORE?

A: In theory, the QKORE will work if you connect your components using a different manufacturer’s wire. However, you would only be getting half of the benefit. The QKORE not only has an electrical approach, but a mechanical approach. By opting out of using the QKORE Wire, especially if you are going to be replacing it with a stranded cable, you will not be benefiting from those mechanical aspects of the QKORE.


Why Does Grounding Matter?

There is a misconception in the hifi industry that grounding a system is just one of a multitude of “minor tweaks” that can be made to a system to marginally improve its performance level. However, this mindset completely underplays the transformative results that proper grounding will bring to a system, as well as the ubiquitous nature of the interference that impacts EVERY sound system.

Interference that impacts the power domain is all around you, constantly bombarding your system. Your AC power lines are contaminated with electrical surges, pulses, and switch-mode hash from home appliances, plug-in chargers, light dimmers, and fluorescent and LED lights. Even the air is polluted by radio frequency interference (RFI) and electromagnetic interference (EMI), levels of which are increasing due to the prevalence of Bluetooth, Wi-Fi, and cellular signals. While you may not be able to hear the noise from these interferences on their own, the effect that they have on your audio components is unmistakable, muddying the playback, collapsing the soundstage of your system, smearing the timing and pacing of music, and making the performance less engaging. 

There are a couple of ways to address your system’s grounding in order to free your components from this electrical noise: external ground rods, low-impedance cables to connect your signal ground access points, or passive, artificial ground units (like the QKORE). Each one of these options have their own merits. However, once your system is properly grounded, there are several improvements you can count on. The image separation of your system will be greatly improved, exposing nuances in dynamics and accent markings that would otherwise have been missed. You’ll also experience a tighter, deeper, and more authoritative bass. However, the most noticeable change will be a dramatic drop in your noise floor which will provide a quieter, ‘darker’ background, resulting in a wider, more lifelike soundstage. 

To learn more about grounding your system, see our download: The Importance of Electrical Grounding in Audio Systems


4 Easy, Free Ways to Address Vibration in Your Sound System

If you have been following this blog, then you already know the remarkably detrimental effects that unwanted vibration can have on your sound system. Smeared imaging, timing errors, and musical distortions are only some of the negative side-effects that hifi enthusiasts live with when they don’t defend their components, loudspeakers, and audio racks from an incessant assault of errant vibrations. Many times, vibration goes unchecked because system owners aren’t willing to invest in the sometimes costly audio accessories designed to address this problem. However, there are a few small, easy adjustments that you can make to your system that will help to greatly reduce the effects of harmful vibrations, without having to spend a cent! 


1. System Placement: 

For aesthetic reasons or special constraints, you may want to hide your audio equipment, or shove it into the corner of a room. However, system placement can play a critical role in the amount of vibration that you are introducing into your system. Avoid placing your audio equipment in corners, behind speakers, or within the same space as household appliances like air conditioners, washing machines, etc. By simply positioning your audio rack in a relatively isolated but open location, you will drastically improve the audible performance of your sound system.


2. Steady Surfaces: 

Obviously, the ideal place to rest your audio equipment would be on an audio rack, purpose-built to minimize vibrations. However, if that is not an option for your listening room or your budget, make sure that whatever surface you choose to hold your components is a sturdy surface that doesn’t shake, rattle, or move in any way. If it has the ability to be leveled, all the better! 


3. Avoid Confined Spaces: 

Resist the urge to neatly tuck your bookshelf speakers inside your actual bookshelves. Avoid placing your speakers or equipment in box-like, confined spaces that could cause resonance or vibrations, like shelving units or cabinets. These confined spaces act like echo-chambers, bouncing vibrations straight back into your speakers and impacting their performance.


4. Leave Space: 

When placing your loudspeakers, make sure that they are minimally two to three feet away from your equipment (preferably resting on their own stands or dedicated surfaces). The sound emanating from you speakers is vibration in itself. When those vibrations hit your components, there is an audible impact. The more space you allow between your speakers and audio components, the more space you are introducing to allow for those vibrations to dissipate into the air, without doing any harm to your equipment. 


While making these changes might not address ALL of the damaging vibration impacting your system’s performance, it is a great start! To learn more about different methods of vibration control, read our blog Three Ways to Address Vibration Control, or download our informative guide, The Importance of Vibration Control.


5 Ways To Improve Your Sound System For Your Time At Home


By now some of us have been home for a couple of weeks, some a couple of months… but we all have at least a couple things in common: we all have some extra time on our hands and are looking for ways to make our life at home more enjoyable. That is why we have put together a list of 5 easy practices and/or products that will get your system sounding great for little to no cost!


1. Level Your Components 

Make sure that your electrical components and loudspeakers are as level as possible. Be precise. In the case of loudspeakers, they should be leveled both horizontally and vertically. Ensuring that the tweeter, mid-range and woofers are vertically aligned, so that the cone and tweeter disbursement is coming from the center vertical line, makes a big difference! And don’t forget to check that your speakers are stable and not rocking on their stands or feet. 

For more details about leveling your speakers, as well as other speaker placement tips, please download our Speaker Set-Up Guide


2.  Get Your Speakers Tight

Hours, months, and years of intense listening sessions, constant vibrations in the speaker cabinet, and even dry air will cause a screw or two to become loose. Make sure to check that binding post connections, and the bolts that hold each driver to their baffle aren’t loose, and tighten any screws that need it. Just be careful not to overtighten, as this could lead to a stripped thread! 

For more affordable speaker upgrades, please see this blog.


3.  Reduce Static Electric Charge 

Static charge build-up on components, cables, carpets, and speakers can do everything from flatten perspectives to inhibit the dynamics of a sound system. In order for your system’s performance to be at its best, use an anti-static treatment to eliminate those static charges. Simply spray a small amount of Eco 3X onto a cloth and wipe down the jacket of your cables and the area around speaker drivers to reveal a more relaxed and natural soundstage. 

For more information on other ways to clean your cables, read this blog.


4. Try An At-Home Demo

Many hifi dealers may have been forced to temporarily close their store locations. However that doesn’t mean that you can’t still try our products in the comfort, and safety of your own home! While you might not be able to bring in heavy loudspeakers for a trial, there are plenty of lighter, more manageable audio components that are perfectly suited for easy transport and home auditions. We may be biased, but we know for a fact that all of Nordost products are perfect for at-home demonstrations. Call your local hifi retailer to see what you can demo today!

For a step-by-step guide to successfully audition hifi cables in your own home, read this blog


5. Upgrade Your Streamer 

When we aren’t enjoying our music, many of us are spending a lot of our time streaming television and movies. For those of you that use an Apple TV media streamer, or any other streaming device powered by a figure 8 power cord, there is an easy, inexpensive upgrade that is sure to take your streaming to the next level! Nordost’s entry level Purple Flare Figure 8 Power Cord is the perfect solution for your Apple TV. The Purple Flare Power Cord uses Nordost’s technology to construct a high-speed, low-loss power cord that will allow your streamer to produce a picture worthy of your system. 

For more information on the Purple Flare Power Cord, read this review.


Questions and Answers: QSOURCE

We thought that we would take the opportunity to share some of our most recent and frequently asked questions about the QSOURCE Linear Power Supply here, so that everyone can get the answers they are looking for!

I have seen the QSOURCE used with the new QPOINT Resonance Synchronizer in reviews, but can it be used with other components too?

The QSOURCE serves as an upgraded power supply for Nordost’s QPOINT Resonance Synchronizers, and is constructed with four, 5V outputs designated specifically for QPOINTS. However, it was also designed as a replacement for the noise-inducing, inconsistent switch mode power supplies that feed music servers, network switches, routers, NAS drives, DC phono stages, DC DACs etc. To accommodate these devices, the QSOURCE provides two outlets that can supply “9V, 12V, or 19V” and “12V, 19V, or 24V” respectively, which can be chosen to match the requirements of your electronics.


Where should I place the QSOURCE in my system? Do I have to plug it into my distribution bar, or can it be plugged directly into the wall?

While you can certainly plug the QSOURCE into your distribution bar, if you don’t have any space available on your QB4, QB8, or whatever product you use in your system, you can plug the QSOURCE directly into the wall. In terms of placement, the QSOURCE can be positioned anywhere on or around your audio rack in a well-ventilated space. Just make sure that the vents both on the top and bottom of the unit are unobstructed at all times.


Is there a difference between the QSOURE DC Cables that you use to power the QPOINT and the QSOURCE DC Cables you use to power other components?

While the cable itself is the same, Nordost offers three termination options for the QSOURCE DC Cable: LEMO to LEMO, LEMO to 5mm x 2.1mm barrel connector, and LEMO to 5mm x 2.5mm barrel connector. The LEMO to LEMO connectors are intended for use with Nordost’s QPOINT Resonance Synchronizers. When connecting any other device to the QSOURCE, you have to verify the required termination for your device from its manufacturer.


Do you need to own a QSOURCE in order to use your QPOINT?

No, when you purchase a QPOINT it comes with a switch-mode power supply so that you can use it immediately, without any additional purchases. However, if you want to get the most out of the QPOINT, we suggest that you introduce a QSOURCE Linear Power Supply into your system for a significant upgrade.


Questions and Answers: QPOINT

At the High End show in Munich we introduced the QPOINT, the newest addition to our QRT line of products. While the QPOINT is just about to start shipping, the response and interest in this product has been overwhelmingly exciting! As is to be expected when groundbreaking technology is released, we have received several questions about the new QPOINT.  We thought that we would take a minute to share some of our most recent and frequently asked questions here so that everyone can get the answers they are looking for!

First, for those of you unfamiliar with this product— The QPOINT is a Resonance Synchronizer that emits a subtle field which impacts and manipulates all electromechanical resonances within its immediate proximity so that they resonate in unison. When placed in a sound system, the QPOINT imparts this unique, metronomic effect on the internal moving parts of targeted components, lowering the system’s noise floor. This cost-effective, one box solution will yield demonstrable improvements to any component in a sound system. The audible results of introducing a QPOINT to a hifi system include enhanced coherency and greater dynamic range in the music, as well as expanded space and ambiance in musical reproduction.


How do I position the QPOINT in relation to my components?

In most circumstances, the QPOINT should be placed under the component that you are trying to affect, with the black dispersion plate pointed up, towards the component (your component may need to be supported using Sort Kones). However, the best placement is determined on a component-by-component basis. For example: If you are pairing a QPOINT with a component that is constructed using a thick, metal chassis, and a comparatively thin top covering, you will get better results placing the QPOINT on top of the component, with the black dispersion plate facing down, towards the component.


Do I need to buy a separate power cord for the QPOINT?

No, the QPOINT is supplied with its own DC power cord which is attached to a switch mode power supply. However, if you would like to significantly upgrade the performance of your QPOINT, Nordost will be coming out with a new product called the QSOURCE Linear Power Supply which does requires a separate QSOURCE DC Cable.


Which component should I use the QPOINT with for the best results?

We suggest that you start by placing the QPOINT under or on top of your preamplifier (or integrated amplifier if applicable), followed by your digital components, then your analog source, and finally your power amplifier(s). However, the results can be system dependent. You should experiment with the placement of your QPOINT to determine what is most beneficial in your unique system.


Speaker Set-Up — Everything you need to get started

Speaker set-up is an exacting and time-consuming process consisting of endless small, repetitive motions. A centimeter back, a touch of a rotation, a tilt forward— every minute movement making a world of difference in the performance of your system. While some find system set-up to be a fun and interactive process, allowing you to intimately understand your hi-fi system, others find it to be pretty tedious.

Whichever side of the camp you fall on, if you come to this task well-prepared, it is sure to go a lot easier for you, and, hopefully, it will be quicker too! That is why we have come up with a comprehensive list of everything that you’ll need as you tackle speaker placement!


1) Masking or “Low-Tack” Painter’s Tape

You’ll be using your masking tape to “grid” the floor and to ensure that you are making uninformed adjustments to both the left and right speakers. You can even use your masking tape to mark the final placement of your speakers, to save you the trouble of redoing the whole process in case your speakers are accidentally moved. If you decide to mark the final placement, you may want to opt for a more discrete colored tape.


2) Marker Pen

You can use any type of writing utensil, as long as it allows you to clearly make marks on your painter’s tape.


3) Tape Measure

Your tape measure should be a least two meters long since it will be used throughout this process to take precise measurements of your speakers, as well as their relation to elements of the room. It may also be used to measure and mark increments on your painter’s tape.


4) Spirit Level

It is best to use a digital level, but both long and short bubble levels can be useful too. Use your level to make sure that your loudspeakers are on an even plane and to find an even rake and azimuth angle for your speakers. It will also help to ensure that all of your components and equipment are level.


5) Laser Pointer

A laser pointer will make it easy to determine if your speakers are set to equal heights. It will also help to identify the sweet spot for your system and allow you to keep track of movements relative to the listening seat.


6) Speaker-Specific Tools

These tools should have been supplied with the speakers themselves to aid in set up. Some tools may include— a spanner for locking spikes, a pry-bar for adjusting spikes, or chocks.


7) Air Wedge (optional)

If working alone, an air wedge (typically used to position doors or windows) will help you lift speakers safely, one side at a time. You should also be aware that many speakers are heavy and moving them should be undertaken only with great care and sufficient manpower for the task. Struggling to move a large speaker on your own could result in serious injury! An extra pair of hands (and ears) will make adjustments much easier, more precise, and safer too.


Now that you have all the equipment handy, you’re ready to get started! To figure out which set-up method works best for you, and to learn other essential tips, download our Speaker Set-Up Guide!


    Download the Nordost Speaker Set-Up Guide


Speaker Set-Up: Time for an Adjustment

It is no industry secret that, when it comes to hi-fi, proper system set-up is nearly as important as the components in the system itself. One of the most integral elements of system set-up is speaker placement. However, once your loudspeakers are perfectly placed, that rarely means your set-up days are gone for good. A hi-fi system is an interconnected entity. Every change that you make to it, whether you upgrade amps, your rack, cables, or any other component, affects the sound, and as a result, adjustments to speaker placement must be made.

At Nordost we are in the business of making your sound system perform its absolute best. As a way of accomplishing that, for years we offered a system tuning and set-up disc.  Recently, we launched the System Solution. This revamped, two-disc set-up tool both improves and expands upon our initial product, offering more content and features, including a unique mix of diagnostic tracks, calibration tools, and system conditioning aids to help with every aspect of system set-up. As a supplement to our original set-up disc, we provided a wildly popular, and helpful “Speaker Placement Guide”. However, when we introduced the System Solution: Set-Up & Tuning Discs, we thought that an update to the guide was also in order!  

If you are familiar with Nordost’s original “Speaker Placement Guide”, you already know that it provides readers with instructions to execute several speaker placement methods widely-used by hi-fi dealers, professional audio installers, and manufacturers. Now, in the newly expanded “Speaker Set-Up Guide”, we have taken loudspeaker set-up even further — sharing our 6-Axis Approach to optimizing speaker positioning. This approach addresses the minor tweaks in fore and aft, sideways, and vertical positioning as well as toe-in, rake, and azimuth angles, which are crucial to accomplishing the ever-important finishing touches in speaker placement.

Whether you are setting up your system for the first time, need to re-tweak your speaker placement after making upgrades over the years, or simply want to fine-tune what you have, our new “Speaker Set-Up Guide” serves as the perfect manual to optimize your sound system.

Download the NEW Nordost Speaker Set-Up Guide today!


Questions and Answers (February 2019)

Our product specialists receive questions on a daily basis about Nordost products, their application, and hifi in general.  We thought that we would take a minute to share some of our most recent and frequently asked questions here so that everyone can get the answers they are looking for!


Q: Do the new Set-Up discs include tracks for some sort of test tone or songs that help with subwoofer set up?

A: Yes, our newly upgraded, set-up and tuning discs offer a unique mix of diagnostic tracks, calibration tools, and system conditioning aids to help with every aspect of system set-up. In fact, there are a whole suite of sweeps and discrete tones to specifically address subwoofer set-up. You can find out more about the System Solution Set-Up & Tuning Discs on the Nordost website.


Q: I know that Nordost always stresses the importance of cable burn-in, but how many hours of break-in does the QK1 need to achieve its best performance?

A: Unlike cables, our QK1 and  QV2’s don’t need a lot of break-in time. Although, since the QK1 is a mechanical device, it does need a little more time than the QV2, which is an electronic device. While you can hear immediate audible changes as soon as they are plugged in, in general, these products need to be plugged in for about a week to achieve their intended performance levels.


Q: Which Nordost speaker cables are available in bi-wire?

A: Typically, Nordost speaker cables are not available in bi-wire. We recommend that you use our Norse Bi-Wire Jumpers for the speaker cables in our Norse and Leif ranges and our Reference Bi-Wire Jumpers for cables in our Reference and Supreme Reference Ranges. We also have customized Bi-Wire Jumpers in both our Valhalla 2 and Odin 2 ranges which are essentially extensions of the speaker cables, in order to ensure that there is an identical sonic signature running throughout your entire system. However, we do offer a bi-wire option in our 4-Flat and SuperFlatline Leifstyle cables.


Q: In the FAQ section it states that the QX2 and QX4 each have a “different focus”. So, is it possible to combine both products in one system?

A: Yes, in most systems you would start with a QX4 between the wall and the power distribution/QBASE (it’s ideal to use a QX4 unit in that position because it is stronger). Then you would add other units, either QX2s or QX4s, between the distribution block and the actual components.


Questions and Answers (August 2018)

Our product specialists receive questions on a daily basis about Nordost products, their application, and hifi in general.  We thought that we would take a minute to share some of our most recent and frequently asked questions here so that everyone can get the answers they are looking for!


Q:  Can I plug my mono amps, their preamp, and a separate integrated amp into one QB8? In other words, there would be two different systems connected to the same QB8 strip.  If yes, where should I plug in the monos vs the integrated?

A:  Theoretically, yes, you could have components from two different configurations plugged into one QB8. However, the QB8 was designed for a single system in terms of ground flow manipulation. If at all possible, you should try to find an alternative solution. Remember, there are current limitations in terms of what the electronics draw so you don’t blow the fuse.  Although pre-amps and source components have low current draw, the amps pull more. If you have three amplifiers plugged into a 15 amp QB8, and each pulls 5 amps, you can’t plug anything else into it.


Q: I have a Nordost Heimdall 2 digital RCA to RCA cable. Can I use it as an analog interconnect if I add one more of the same cable? Will this combination sonically be equal to a pair of Heimdall 2 Analog Interconnects?

A: If you need to, yes, a digital cable will pass an analog signal (although an analog cable will not pass a digital signal!). While the performance level would be close, in this application, an actual analog cable will sound better.


Q: Does Nordost offer a 3.0 USB cable? I noticed that the whole USB line is configured for USB 2.0.

A: Yes, our Frey 2 USB Cable is 3.0 compatible, and can be ordered with 3.0 terminations.


Q: What is the difference between the original Frey and the Frey 2 Analog Interconnect?

A: There are quite a lot of differences between Frey 1 and Frey 2. The conductor gauge went from 26 to 24, which by itself gives more “weight” or “body” to the sound.  The Frey 2 cables also went from using Mono-Filament to Dual Mono-filament technology which surrounds the conductor with even more air. The connectors went from WBT to Neutrik MoonGlo, which has far better emphasis on grounding. Lastly, we changed the conductors to an asymmetrical configuration.